Tag Archives: guitar lessons near me

Why Doing Your “Best” Is Not Enough

By Chad Crawford, PMI Guitar Instructor

Don’t sweat the small stuff! So goes the old saying, and within its sphere this is a sage piece of advice. When playing guitar the ability to cruise past mistakes without getting derailed is critical.  However, we need to keep in mind that playing guitar and practicing guitar are very different things. When practicing guitar we very much need to sweat the small stuff. Practice does not make perfect unless it is perfect practice! Repetition of slop guarantees playing slop. So when practicing we need to perform every detail of our technique as perfectly as possible. Of course “perfection” by its nature is not a realistic goal. The point is that we need to be continually striving to improve on the details of how we interact with the guitar. If we make “perfection” the target of our technique endeavors then our actual results will be far superior to those resulting from a vague goal like “doing the best I can”.

While doing our best is not a bad ideal, in practical application this kind of ambiguously defined goal leaves us a lot of room for actually not doing our best. If we measure doing our best solely by subjective criteria such as “this felt difficult so I must have been doing my best,” that is a well-intended but flawed yardstick by which to determine what is our best. Our best practice will result when we apply focused attention to the smallest details of our technique, measuring by objective criteria rather than by our perceptions of difficulty or success.

It is important to understand that people do not deliberately set out to practice in ways that are less than productive. Rather, focused concentration for extended periods is not our default mode of thinking, such that errors creep in just under our notice despite our general intent to “do our best”. So it is important to make a conscious effort to pay attention to the details!

Let us then look at some specific details of common technique flaws among students of guitar. Keep in mind, the goal of this discussion is constructive feedback toward the end of identifying problems and correcting them. Merely adopting the ideal that it is good to pay attention to detail will make no difference in your progress. You have to actually make the conscious effort to implement!

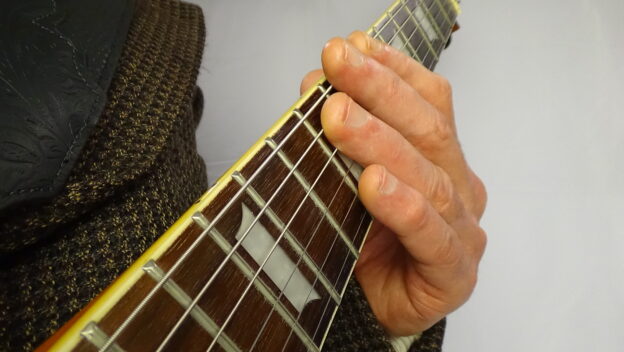
1 – Harsh Chord Changes: chord changes is one of toughest challenges for beginning guitar players. Just getting the fingers to work separately from one another at all is a full agenda. Once you get past this then the next step is to work on changing chords while keeping a rhythm pattern going. This is where the problem with attention to detail begins to show. Specifically, releasing tension on the last beat of the current chord in anticipation of the finger shifting for the next chord, such that the pick stroke yields a buzzy thud instead of a clear harmonious ringing. Most do not realize they are doing this until I point it out. Why? Because they have already shifted their focus off of the details of the current chord and onto the chord that is yet to happen. This is a perfect example of how lack of attention to detail results in undesirable results. If you want your chord rhythms to flow nicely so that they sound smooth then pay close attention to the last pick stroke of each chord and make sure you are retaining the fingering of the current chord until it is time to change. If this means you have to slow down to execute the chord change properly then do it. Speed up gradually as your muscle memory of the finger positioning allows it. 

2 – Choppy Scales: for scales to sound their best we need to play them with no time lapse between notes. This requires consistent finger pressure on each note until the precise moment of the change to the next note, and then a coordinated execution between the fret hand finger and the pick stroke as we shift to the new note. One common problem I observe is releasing pressure on the current note just as soon as the note is made. The cause is the same as the chord changing issue … preoccupation with the note ahead to the detriment of the one currently ringing. It is critical to pay attention to keeping the current note “live” while maneuvering both hands to set up the next note. Another common problem is lack of precise coordination between the two hands such that the pick strikes the string either before or after the placement of the fret hand finger on the upcoming note.  Again, both of these issues respond well to slowing down and paying attention to the details of your fingering and two hand synchronization, such that you execute notes well. Then after sufficient repetition to enforce the habits of hand, speed up gradually as your mastery allows while continuing to pay attention to these details. 

3 – Bends and Vibrato: bending along with its cousin vibrato are the most powerful, expressive techniques we have as guitarists – when they are executed well. They are also among the most difficult things to master since they are entirely under your control, unlike simply fingering a single note or chord where you have the frets to help you with pitch accuracy. The common problems I see with bending and vibrato are picking the string after the bend has started, bending up to an out of tune pitch, and then releasing the bend to a pitch other than the original unbent note. Again, these all respond well to slowing down and paying attention to the start, peak, and trough of the bend, then repeating until accurate bends become a habit while continuing to monitor the accuracy of peaks and troughs. Then speed up as improvements in muscle memory permit.

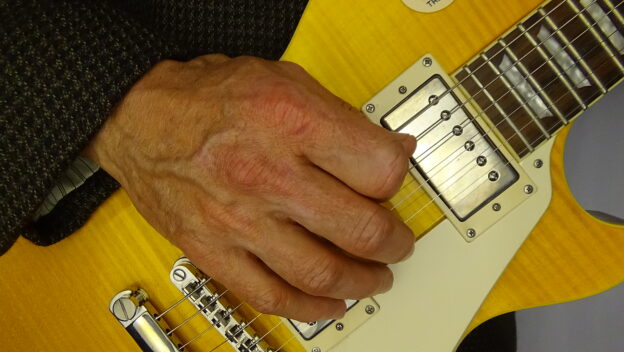
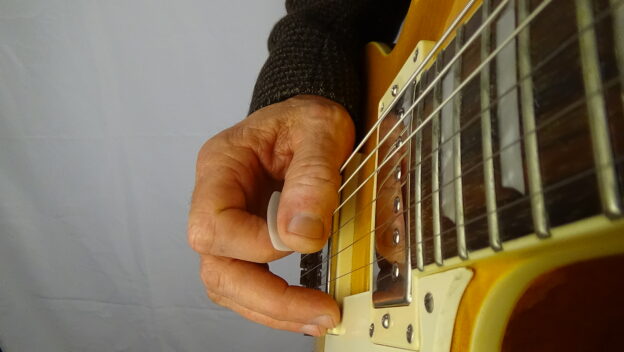
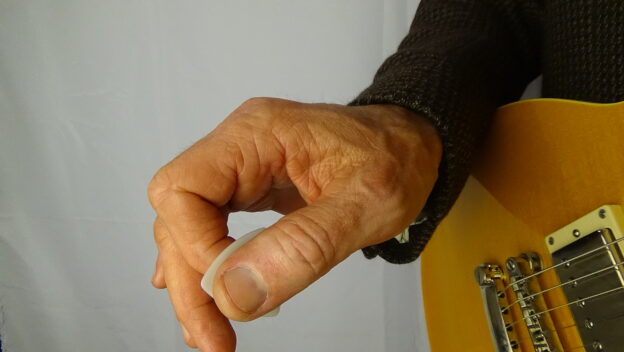
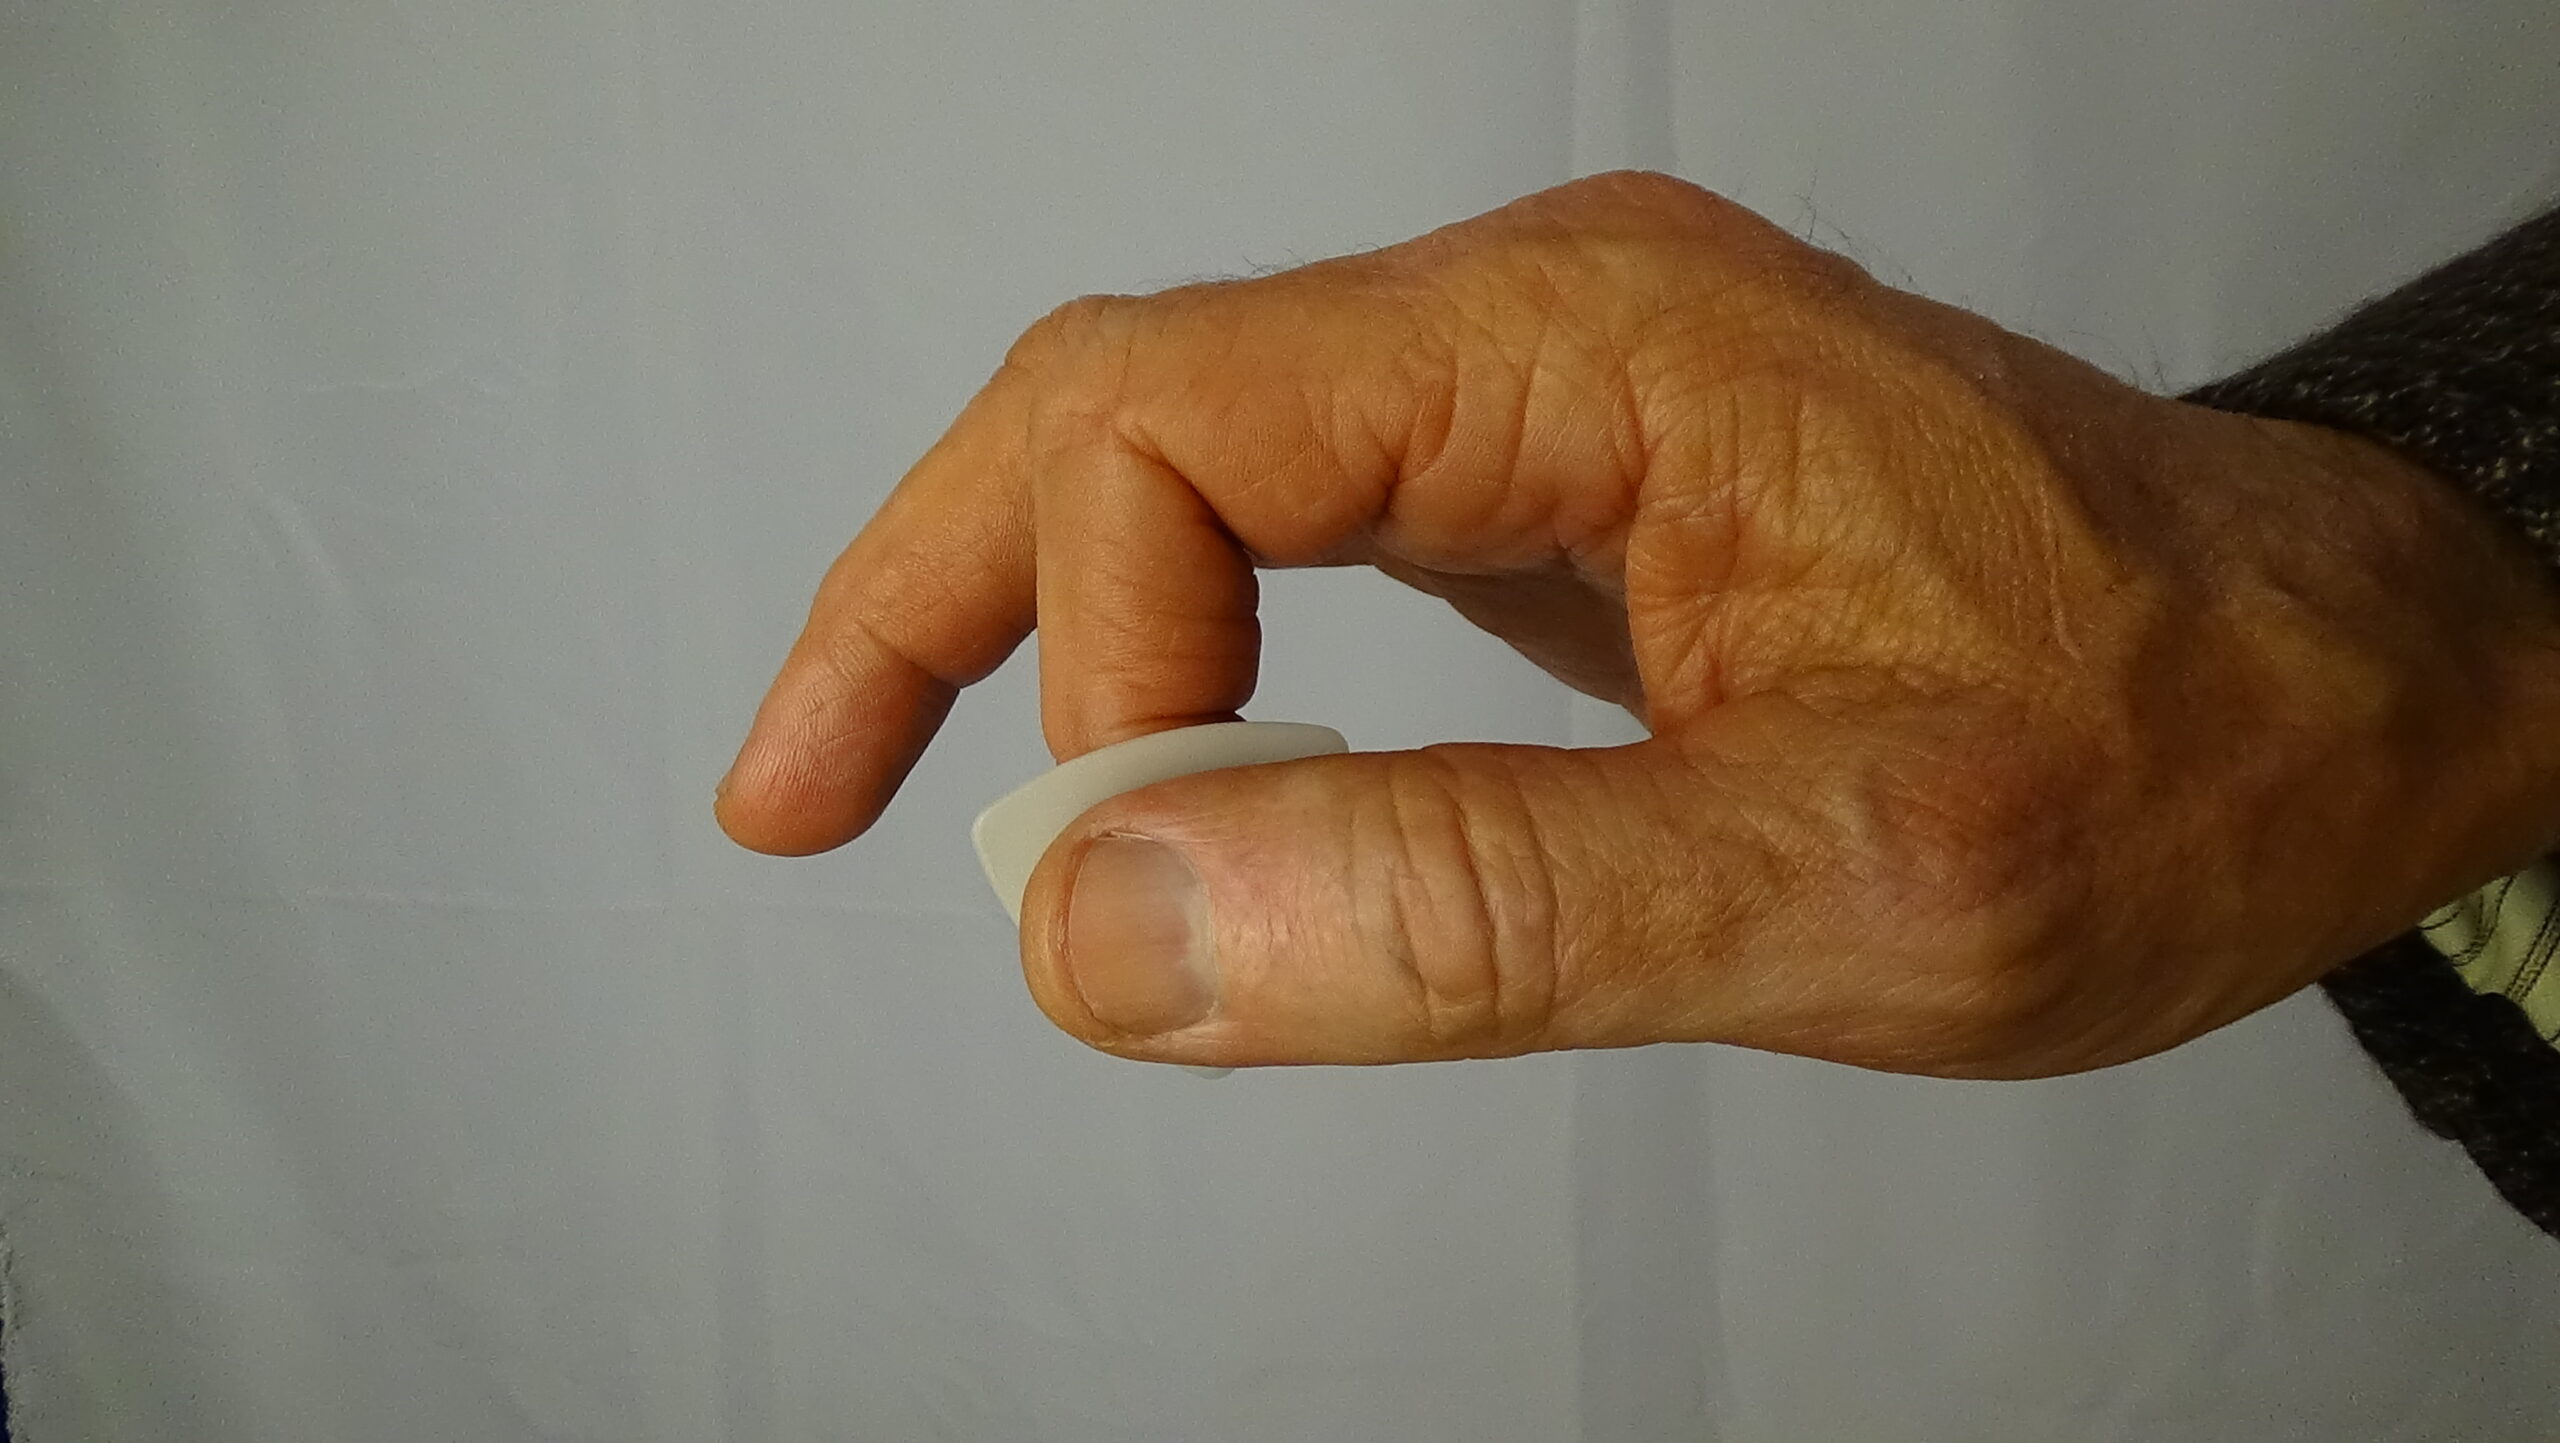
4 – Pick Hold & Orientation for Single Notes: the pick should be located between the pad of the thumb and the side of the forefinger, and the wrist should be relaxed such that the pick makes roughly a 30-45 degree angle to the strings. Then play with the base of the hand parallel to the strings, with a sharp but relaxed bump of the wrist to make the pick stroke. While this is physiologically the easiest, most comfortable way to hold and maneuver the pick, we tend to bring a lot of hangover from our handwriting habits into picking. This results in all manner of difficulties, such as bringing the middle finger into the pick hold, trying to pick from the far side of the hand (as with writing), and all manner of wasteful sweeping and swooshing motions where the job requires only a straightforward 1/4 inch arc of the pick. These handwriting habits are hard to break, but it is possible, and essential for fast and accurate picking. While practicing scales, pay attention to these details and force your pick hand to comply until it becomes a habit.

5 – Pick Hold & Orientation for Strumming: the pick hold is the same as for single notes. However, the pick stroke for strumming should come from the elbow, with the pick making a straight line across the strings. For the best tone we need light contact with the strings and a fast moving pick coming from a controlled flick of the wrist. Common problems with strumming are locking the wrist and then plowing harshly through the strings, trying to make an arc from the wrist rather then the elbow, and playing an arch or angle rather than a straight line parallel to the strings. Pay attention to these details for a smooth, chimey, shimmering tone from the strings while strumming.

6 – Excess Tension: this is a universal problem among beginner and even intermediate level guitarists. Playing with too much muscular power results in pressing fretted notes too hard, often bending them out of tune. A heavy handed pick attack results in notes and chords that sound harsh. Excessive muscular tension is an automatic nervous system response to physical challenge arising from our instinctive “fight or flight” mechanism. While this response is very useful when we encounter a bear in the woods, it is a disaster to our guitar technique. Playing guitar is a dance, not a fight. We must play with finesse, not power, if we want our guitars to yield up pleasing sounds in response to our manipulation. All of the problems above are at least partially a result of playing with excessive muscular tension. You can counter the fight or flight response with deliberate focused attention on the state of muscular tension in your hands, arms, and shoulders while practicing scales and chord rhythms. Make it a habit to play with as little muscular exertion as possible. 

Finally, be sure to practice as often as possible! Learning guitar is all about memory in terms of both mental recall and physical muscle control. Every day that you do not practice you lose a bit of recall and muscle memory. That is just the way the human machine functions and there is not much we can do about it. Therefore, it is best to practice every day. This is not feasible for many hobbyists. In this case, make it a point to practice more days than not … at least five days a week.

Pay attention to the details to ensure that your practice routine is leading to progress rather than frustration!

Copyright © 2005 Palmetto Music Institute. All Rights Reserved.

GuitarBaby

How Are You Stacking Up?

By Chad Crawford, Guitar Instructor

Learning to play an instrument well is a process involving study, memorization, repetition, and refinement, all of which happen across time. It is not a matter of giant leaps but rather steady increments of progress. While a good program of instruction combined with a good practice routine yields inevitable results, at times the progress may seem very slow or non-existent. It is easy during these spells to become discouraged and possibly even give up altogether, so it is important to be able to make realistic evaluations of progress. The four steps below will help you to measure your progress realistically.

1. Avoid comparisons – it is not profitable in any way to compare your progress or your current skills to those of others, especially iconic professionals. Regardless of what you may have heard or read, no one achieves a high level of musicianship without sustained effort across a period of years. Aspiring guitarists have widely varying circumstances which lead to widely varying progress rates and skill levels. Additionally, every musician has strengths and weaknesses in various areas such that comparing your current weaknesses to another’s current strengths will leave you with a warped view of how you are doing. The only legitimate and relevant measure of progress is how you are doing today versus how you were doing last month, six months ago, and last year.

2. Excessive concern with mistakes – ideally we all want to play perfectly, and continual effort towards perfecting our music is advisable. However, while learning guitar be cautious about striking a realistic balance between continual progress and reasonable allowance for mistakes and imperfections. These are a perfectly normal part of the process. They key to dealing with them is to not let them completely derail your playing, such as stopping every time you make a mistake. Avoid the temptation to think that mistakes in your playing mean that your music is no good and that you are not making any progress. Even pros make mistakes.

3. Avoid measuring progress by “feel” – few would attempt to measure a distance of one foot by solely considering how they feel about how long one foot is. Rather, most would simply apply a tape measure to the job. Contrarily, many attempt to measure their progress as musicians by how they feel about their playing at the moment. This is of course completely unrealistic, but it is also a common human response to a long term process.  Preoccupation with results can be wearisome if we are working towards a wildly fluctuating target such as our feelings. If your feelings about your progress are at odds with objective measures of progress then recognize the feelings as irrelevant and put them aside.

4. Utilize objective measures of progress – It is an inevitable aspect of human nature that we tend toward looking at the negative side of things. This tendency is magnified when working our way through a long term endeavor such as learning music. Counter this by using an objective standard such as a practice schedule cataloging effort toward various knowledge and skills relevant to your playing goals. Then you will be able to see plainly, without the cloud of fickle feelings and negativity, when you are in fact making real progress.

So remember … the only real and relevant measure of progress is measuring your past knowledge and technique against your present knowledge and technique.

Copyright © 2005 Palmetto Music Institute. All Rights Reserved.

Guitar Pick Hand Technique

Don’t Allow Instinct To Ruin Your Technique

By Chad Crawford, PMI Guitar Instructor

After a couple of decades of teaching guitar and interacting with other teachers and many clients, I can make a number of predictions on what any aspiring guitarist will struggle with and how the various responses to these stumbling blocks will either help or hinder progress.  The guitar is a challenging instrument, and there are any number of areas where one might encounter a temporary roadblock. Of these typical areas, there is one that stands out above all others as the number one barrier to progress: not following the instructions.

Allow me to clarify this concept since the phrase alone may seem too broad and actually contrary to your experience. I doubt you have ever openly refused to learn a particular chord, for example, or a basic scale pattern. This is not the sort of thing I mean when I suggest that a significant percentage of guitar students often stumble in implementing course recommendations. It is not a matter of people intentionally side-stepping the instructions. Rather it is that certain aspects of optimum physical technique run contrary to our instincts. Most students tackling a challenge in physical technique tend to unconsciously default back to instincts rather than consistently apply good technique recommendations. I am guilty of this as much as anyone, although I have improved significantly over the years in applying what the guitarist community has found to be the most effective technique development methods. 

Now let me narrow this down to the specific items that I see over and over. If any of these seem to apply to you, keep in mind that I am not writing about any specific person or experience, but rather my collective experience as a guitar student and teacher. Although some of these may apply to you, they are universal themes in the guitar community, so don’t feel like I’m singling you out for a hard time!

  1. Tickle the strings rather than tackle them.
  2. For playing chord rhythms, use a wide, fast, and light-contact pick stroke.
  3. For playing individual notes or muted two-string intervals (fifth chords, double stops) keep the pick hand palm turned into the guitar so that the pick moves parallel to the plane of the strings with a mere flick of the wrist.
  4. Apply no more pressure to the strings/frets than necessary to sound out a clear note.
  5. Avoid grasping the guitar neck with the palm and thumb as if it were a baseball bat.
  6. Use your elbow to change the working range of your pick – not your wrist or your shoulder.
  7. When changing to an upcoming chord, avoid chopping off the last beat of the previous chord by releasing pressure too early.
  8. Unless you are practicing specifically to develop speed, do not practice at a tempo faster than you can play with good note articulation and two-hand synchronization.
  9. When learning a new rhythm pattern, strum slowly and consciously count the beats and divisions of the beats, rather than trying to play the rhythm by “feel”. Once you have conscious mastery of the pattern only then should you work on keeping time by feel. 

If you have taken lessons with me for any length of time then you will know that I teach these things routinely, so you may wonder why I am taking up a Newsletter column with this routine lesson fare. There is a good reason I am emphasizing these things:  between knowing good technique and doing good technique, there is a subconscious barrier that we all struggle with: instinct. As your teacher, one of the most significant challenges I face in helping you develop your skills is your own instincts, such as using much more strength than is necessary, or handling the pick as if it is a plow. When attempting to play scale notes for the first time you will likely pull your other fingers way back from the fretboard. Then you have to slam the next finger down like a dive bomber in order to stay in time on the next note. This causes subtle delays that cap your top speed at limits far below your potential.

The first step in conquering these barriers is to be aware of these instinctive actions and over-reactions, so that you can be ready to spot them and counter with deliberate focused repetition of a balanced, optimum technique method that cooperates as far as possible with your natural physiology.  Then, apply focused attention to repetitions of good technique. Repetition of good technique results in habits, such that good technique becomes increasingly automatic, enabling to you to move between chords and notes accurately with little conscious effort.

Here is where the process breaks down: the focused repetition of good technique, and specifically the focus aspect. Your hands will constantly try to resort back to instinctive positions and motions, even though your conscious mind is well aware of these issues. You must pay close attention to these details of technique when you practice. This can be tedious at times, but the pay off is more than worth the effort!

Copyright © 2025 Palmetto Music Institute. All Rights Reserved.

Guitar Lessons Greenville

Stop Playing Guitar!

by Chad Crawford, PMI Guitar Instructor

Practicing guitar and playing guitar are not the same thing, and it is important to understand the difference if we want to maximize our progress.  While playing guitar is the end game of practicing, and we need to spend plenty of time playing, practicing is the means to the end of playing. It is essential to practice well and not allow playing to take over during what should be practice time. Although this may seem obvious on the surface, it is very easy to drift over into playing while trying to practice. Here we will look at the differences and consider how to avoid this pitfall.  

So let us consider the differences between the two and how to avoid mixing them up. Playing guitar is the broad application of all our knowledge and technique skills into making music. Practicing guitar is deliberate focus on a narrow range of knowledge and technique skills with the specific goal of cultivating improvement in those specific areas. While playing, we focus on all that we can do. While practicing we focus on what we can not yet do, or do as well as we would prefer.

Here are some measures to avoid getting stuck in a rut by playing through practice time:

1. Consider where you are, where you need to be, and how to get there – if you have no master plan for reaching your musical goals then you can be sure that your practice time will consist of merely playing what you already know rather than making specific improvements in those things that will allow you access to the next musical level. To devise a master plan you should look to the music you wish to play and find out what kinds of chords, rhythms, scales/arpeggios, and techniques arise in that music. Focus on those things in order to play that kind of music.

2. Define goals for every practice session – if you practice with no particular goal in mind then you will get exactly where you planned to get – nowhere. In every practice session have a plan to work on improving specific aspects of knowledge and technique according to your overall master plan. Committing your plan to paper will aid greatly in keeping it in view during practice.

3. Focus on specific aspects of knowledge and technique during practice – when you are for instance practicing the scales you need for your preferred musical style, focus specifically on timing, note articulation, resolving notes, technique (relaxed fingers!), two hand synchronization, and eventually speed. You may have to break these goals down across several practice sessions per week so that you can devote adequate time and attention to each. Playing licks that you already know, or mindlessly wandering up and down through scales, is not practice. That is playing and it will not help you improve nearly as much as practicing. 

4. Push yourself to do better than yesterday – profitable practice does not come from merely repeating what you did yesterday. It comes from making it a point to do better than you did yesterday. Doing better than you did yesterday does not come from merely accepting the vague proposition that you will try do better today then you did yesterday. It comes from focused attention to the minute details of your playing, such as striving for better note articulation of scales, faster chord changes, or deliberately playing with less overall muscular tension than yesterday.

5. Maintain your attention on the details – it is very easy to allow the attention to wander off during doing repetitive aspects of a practice routine. Focus yields much greater results, and focus is an ongoing choice because the mind tends strongly toward wandering off from one thing to another. Choose to keep your mind focused on the details of what you are working on!

6. Include some playing time in your musical endeavors – it is pointless to pursue music if it is going to mean nothing but practice. Allow yourself some time within each practice session, or a few times a week if that works better for you, to just play without being overly concerned about the perfection of the details. Perfect the details during practice, and then relax and let your hands do their thing when you play. During playing time, do whatever is the best you can do and don’t allow mistakes to rob your enjoyment of it. Just play and enjoy what comes out well. As you progress through diligent practice, you will find that your playing includes increasingly fewer mistakes and more enjoyment. It is a process. Give it time.

Copyright © 2005 Palmetto Music Institute. All Rights Reserved.

P-Bass

Can’t Remember Where You Left Your Memory?

By Chad Crawford, PMI Guitar Instructor

One of the greatest areas of struggle for most guitarists is remembering the numerous chords, scales, chord progressions, and other odds and ends that we must employ to reproduce our favorite songs or to improvise. While there is no way to make memorization of large amounts of information easy, there are things we can do to make it more predictable and consistent and thus produce better results and faster progress in our playing.

Psychologists advise that lifestyle greatly affects memory. While this article is specifically directed at musical pursuits rather than memory in general, it is worth mentioning that a healthy diet, regular exercise, and adequate sleep allow our memories to function at their maximum potential. If you want the best results from your musical endeavors, take good care of yourself!

For musicians, we need to focus specifically on two components of memory: procedural memory and declarative memory. Procedural memory, for our purposes, refers to that aspect of recall pertaining to executing physical tasks. In musician lingo we often refer to this as muscle memory. Declarative memory is that aspect of memory that allows us to recall facts and figures, such as chord shapes, scale patterns, and the intervals of the root notes of chord progressions. So now that we have a view of the two aspects of memory we need to master, let’s look at some specific strategies.

Improving Muscle Memory

  1. Repetition – there is no substitute for repetition. You may have heard something of the old adage among guitar players about “playing until my fingers bleed”. While this may sound like a ridiculous hyperbole, I have in fact literally practiced extreme bends for certain licks to the point that one of my fingernails began to separate from the nail bed and seep blood. While I don’t recommend this, it does illustrate the point that repetition is the key to muscle memory. The more you repeat good executions of a given technique, the better you will play it. This is also incidentally one of the keys to overcoming “stage fright” – embed your skills so deeply into your muscle memory that you can execute them accurately regardless of any distractions.
  • Consistencyyou will get much better results from your muscle memory by practicing a moderate amount of repetition daily as opposed to trying to cram in a large block of repetitions on the weekend or the day before your next lesson!
  • Focus – repetition of slop leads to playing slop. It is extremely important to pay attention when practicing scales, for instance. Be sure that you are relaxed and using the most efficient motions possible for each note. When you are learning something new it is important to practice it at a speed that will allow you to play it accurately and efficiently. That often means “excruciatingly slow”. If that is what it means then do it that way. You will never have speed without slop until you thoroughly train your muscle memory to execute the required motions as efficiently and accurately as possible. Then gradually increase speed, maintaining a balance between speed and accurate execution.
  • Test – it is critical that you push the limits of your muscle memory by testing it routinely. Once you have learned a scale pattern then work on playing through it without looking at your fret hand fingers. Likewise, once you have learned a new chord then get started with applying the chord in a chord progression without looking at your fretting hand. Observe mistakes, correct them, and repeat. This will greatly increase your speed in mastering technique.

Improving Recall

  1. Focus – as with muscle memory, focused attention on the details of new information will greatly increase your ability to recall that information. While this may seem obvious, it is important to be aware that we all have a tendency to allow our thoughts to drift randomly. For maximum understanding and recall it is imperative to willfully interrupt the random flow of thought and focus your attention while trying to digest new information.
  • Focus – see item 1. This is so important that I am repeating it to help you remember it!
  • Relation – as often as possible, try to relate new information to things that you already know. For instance, if you know the first position A Major chord shape then it is not so difficult to recall that the A7 is simply A Major minus the middle note. Likewise, all of the A form bar chords are an offshoot of the A Major chord shape, so if you know the A Major well enough then the various bar forms are not so hard to remember.
  • Isolation – break complicated sets of information into parts and memorize the individual parts first, then assemble them into the complete set. For instance, with a new scale pattern memorize the notes on two strings. Then move to the next pair of strings, then the next. Then go back and put them all together into the complete pattern. For a tablature score, learn one line. Then move to the next and learn that one. Then play the two together. Then learn the next line, and then add that to previous two. Repeat until the song is complete. Then repeat until your fingers bleed!
  •  Consistency – as with muscle memory, recall responds well to repeated exposure to the same information. This is why it is much more productive to practice a half hour a day than to run practice marathons on the weekends.
  • Vocalize – where feasible, find some way to say out loud what you are trying to memorize. Speaking things aids the memory in storing them. Example: when trying to memorize notes along the fretboard, say the notes out loud as you are playing them. This will greatly speed up your ability to recall the names of the notes.

Following these recommendations will greatly increase the rate of speed of your mastery of all things guitar. We all struggle with memory, but these strategies will assist you in increasing the rate at which you conquer various elements of musicianship. Remember this: never give up!

Copyright © 2025 Palmetto Music Institute

Guitar Technique

Seizing Upon the Power of Habit

By Chad Crawford, PMI Guitar Instructor

Aspiring guitarists grapple with a number of challenges in perfecting the craft. From memory failure to reluctant hands, we all struggle with predictable challenges. Some of these issues are inherent flaws in the human machine about which we can do little. Others are more within the realm of our choosing, and choose well we must if we wish to have the best possible results for our efforts.

Among the numerous assets we have to help us overcome barriers to progress, none is more potent than the power of habit. Mastering the guitar is very much a matter of cultivating good habits, both mentally and physically. Contrarily, allowing bad habits to persist will torpedo our efforts. Unfortunately, the default setting of the human machine is toward counterproductive habits. Alternatively, through exercise of our will we may choose to cultivate good habits that support musical excellence. So we must persist in a productive practice routine with various repetitive mental and physical exercises such that basic skills like chord changes, scales, and rhythm patterns become habitual. Once these things become habitual then we can then keep them habitual with only a bit of routine maintenance, and then we are free to focus on the more exciting and gratifying subtleties of making good music.

So let’s take a look at a list of techniques and strategies that will assist in cultivating good habits. These are not randomly selected tidbits, but rather key areas of fundamental knowledge and technique where I observe students struggling time after time. You can use the power of habit to help you get these fundamentals out of the way as soon as possible so that you can move on to more interesting things.

  1. Practice Scheduling – set up a designated place where you will practice. Keep your guitar handy on a stand and your practice materials and metronome already out or readily accessible. Make an effort to practice at the same time of day as much as possible so that it becomes a habit, where you then feel uncomfortable if you don’t get started at the appointed time.
  • Fretboard Note Recognition – set aside some time each time you practice to target some area of the fretboard for note memorization. Break this formidable task into small chunks according to various schemes of dividing the fretboard such as notes along one string, one fret, etc. Make it a habit to memorize the notes along any one such scheme every week.
  • Chord Changes – changing chords quickly and accurately is the most significant barrier that beginning students struggle with, and one of the more frustrating. It is one of the keys to making really satisfying music, so it is important to get this under control as quickly as possible. Many students tend to develop a habit of pausing the rhythm at chord changes and allowing themselves ample time to change chords. While this is impossible to get around at first, it quickly becomes a habit that persists long after the student is actually able to change chords without losing time. Avoid this trap by always making the effort to target the first beat of a measure for having your chord change complete. Be there on the 1 count!
  • Chord Strumming Technique – while focusing on changing chords, many fall prey to a weak pick attack consisting of a half-hearted push of the pick through the strings along with a short pick stroke. Cultivate a habit of starting each down stroke at the top of the guitar body and follow through to the other side of the guitar body. Then reverse this for the upstroke. Do not push the pick through the strings as this sounds harsh and unpleasant. Perform the pick stroke with a lively snatch of the forearm, allowing the relaxed hand/wrist to follow along, and thus drag the pick quickly and lightly along the top of the strings. This is not going to happen by accident. Force it until it becomes automatic.
  • Playing Scales with a Legato Feel – when practicing scale patterns always allow the previous note to run into the next note with no silence in between. This means you must maintain pressure on the previous note and snap your fingertip onto the upcoming note while simultaneously making the pick stroke for the new note. Pay attention to this important detail and keep paying attention to it until it becomes a good habit!
  • Playing Phrases in Time – to get started with solo phrasing, always play your scale notes on the beat and resolve on the first beat of the underlying chord change. This may be obvious to the mind, but getting the fingers to cooperate does not happen automatically. It is very easy and very common to get absorbed with fingering notes and lose track of the timing. Make it a habit to pay attention to the beat while phrasing, and play your notes on beat.

Habits can work for you or against you. Ensure that they work for you by diligently following the tips above every time you practice. Cultivating good habits will greatly increase your rate of progress.

Copyright © 2025 Palmetto Music Institute. All Rights Reserved.

Guitar Pick Hold

Best Practices for Practice

By Chad Crawford, Guitar Instructor Greenville Guitar Lessons by PMI

If you have been playing guitar for any length of time then you know by now that the one supreme key to results is this: practice! However, it is possible to practice routinely and still get poor results. How is this? It is by practicing the wrong things, in the wrong order, and in the wrong way.

So how can you know what to practice, what order to practice it in, and how to practice for maximum results? Follow the recommendations below to make the most of your practice time.

What to practice:

(1) Playing guitar is a complex combination of mental and physical skills. In order to master the subject we need to break it down into manageable pieces. What specifically to practice is too big of a subject for a short article. However, what we can do here is narrow down the possibilities. The most important thing you need to consider is your goals. If your goal is too generalized it will not help you nail down what you need to practice. For instance, if you set an overly broad goal such as, “I just want to be able to play guitar,” this is not going to help you identify what information you need to learn and what techniques you need to master. If you are not sure about your goals then you should give some thought to what kind of music you like to listen to. Then you must identify what you must learn to do to mimic this kind of music. Those are the things that you need to practice. Make a list of those things and then go to work on them every time you practice. Do not get bogged down in practicing one technique or one song. Practice a variety of things pertinent to your goals.

(2) A common problem I see among aspiring guitarists is the tendency to want to know and master everything about guitar. While the idea is not a bad one in theory, the reality is that music has been under development for several thousand years. It is a huge subject. Some universities offer doctorate level programs in music. As a hobbyist you do not have time to master “everything” about guitar. You are going to have enough on your hands pursue fluency in one style and play passingly well in two or three related styles. So don’t waste your time learning exotic scales and chords if your intent is to play popular radio songs. Learning obscure modes is not going to make you a better player if you are still struggling with applying the pentatonic scales. Master the basic chords, scales, and techniques and then work on applying them effectively. Once you have reached a level that you can enjoy playing the basics then it is time to work on the more complicated stuff, and then only if it is applicable to your goals at that point.

(3) At the other extreme is the tendency to want to learn only bare minimum requirements for playing specific songs. There is a bit of controversy in the guitar teaching community as to whether learning specific songs is an ideal method. I think learning songs can be very helpful to mastering knowledge and techniques on the condition that the songs are incorporated into a balanced program of learning music in general rather than just learning the bare minimum information and techniques to play the specific songs. Taken by itself, learning songs is a dead end that leaves many aspiring guitarists frustrated and burned out. Don’t let this happen to you!

How to practice:

(1) One of the recurring problems I see with students of guitar is the tendency to get into a self-defeating routine with practice. It is not that a practice routine itself is problematic. Practice certainly does need to be a routine undertaking. The problem develops in that practicing specific exercises becomes a matter of mindlessly running through the same material with no specific mental focus on improvement. Practice becomes an exercise in repeating the same stuff from yesterday in the same way. This is the number one issue I see that impedes progress. When you practice any skill, it is important that you focus on doing it better today than yesterday. Whether it be memorizing some chord, scale, or song, or improving the speed or finesse of chord changes or scales, it is important to push yourself to make an increment of progress every time you practice something!

(2) Another common problem is the tendency to rush through practice. While speed is essential in executing chord changes and phrases, you must balance speed with accuracy. Rushing through every exercise as fast as possible will only delay your progress. Make the effort to ensure that your execution is accurate as well as fast. This often means that you will have to slow something down to a tempo that may be completely unrealistic for actual playing and then practice at that speed until you can execute the technique fairly well. Then gradually increase speed as you are able.

(3) Finally, be sure to practice as often as possible! Learning guitar is all about memory in terms of both mental recall and physical muscle control. Every day that you do not practice you lose a bit of recall and muscle memory. That is just the way the human machine functions and there is not much we can do about it. Therefore, it would be best to practice every single day. However, this is not feasible for many hobbyists. In this case, make it a point to practice more days than not … at least four days a week.

Follow these guidelines to ensure that your practice routine is leading to progress rather than frustration!

Copyright © 2005 Palmetto Music Institute. All Rights Reserved.

Guitar Lessons Greenville SC

Guitar Amplifiers and Tone

by Chad Crawford, PMI Guitar Instructor

The wonderful sound that comes out of an amplifier begins with a tiny electromagnetic impulse in your guitar’s pick-up coil(s). This tiny, constantly varying impulse imposes an electronic signal at the guitar’s output port which travels along the cord into your amplifier. The amplifier receives this signal and sends it through several stages of amplification to produce a signal powerful enough to drive the speaker(s).

An amplifier typically consists of two overall stages of amplification: pre-amp, and power amp. The pre-amp stage is the one that receives the input from your guitar and processes it into a larger signal with tone alterations for presentation to the power amp stage. The pre-amp is where the amplifier allows you to alter specific tonal features such as bass, mid range, and treble, as well as apply built-in effects such as distortion (a.k.a. gain) and reverb.

The job of the power amp stage is to pick up the output signal from the pre-amp and magnify it up to a power level sufficient to drive your speakers via an output transformer. The purpose of the output transformer is to match the electromagnetic characteristics (impedance) of your amplifier’s power stage to the electromagnetic characteristics of your speaker(s), so that the amplifier will couple the maximum amount of available power to the speakers.

Tube vs. Solid State

It is important understand the difference in response between vacuum tube and solid state amplifiers. Tubes bring two very important characteristics to guitar amplification. First, they inherently add content known as harmonics, also often referred to by guitarists as overtones. In audio amplification outside the realms of guitar, these added audio components constitute an undesirable form of distortion. In guitar amplification they provide a pleasant sounding addition to the otherwise pure guitar tone. Secondly, tubes tends to react more strongly than transistors to changes in input, such that tube amps tend to provide a more sensitive response to the input from the guitar player. This tends to magnify the effect of changes in dynamics provided by variations in pick attack, such that the tube amp feels to many guitarists more like dancing with a willing partner, as opposed to the solid state amp’s more simple and indifferent magnification of the volume. For the less experienced guitarist these differences in response between the two types of amplification may be meaningless, but as experience accumulates these things will become more noticeable.

On some more elaborate amplifiers you may be able to pick off the signal at various stages of amplification for additional processing and/or routing. Many amplifiers have an effects loop which will allow you to insert patch cords after the pre-amp stage that will route the signal to an external effects processor and then back into your amp. Some amps also have a patch port between the pre-amp stage and the power amp stage that allows you to completely separate the two stages. This would allow you for instance to use the pre-amp stage from one amp to provide a signal to the power stage of another amp.

Tone Implications of Combo vs. Head/Cabinet

Guitar amps come in two basic physical configurations: combo and head/cabinet. A combo (short for combination) amp has the electronic circuitry and the speaker(s) all in one convenient box. Alternatively, you may wish to keep your amplifier itself separate from the speakers so that you have tonal options by matching up different amplifiers and speakers, as well as weight management for heavier amps and speaker cabinets. In this case you would want the amplifier in a box by itself. We call these amp-only boxes amplifier heads, or head for short. So we attach the head via a speaker cable (not the same cable as a guitar cable!) to a separate box that has only a speaker or multiple speakers. This is why many amp heads have several speaker output ports, so that you can use the head to drive speaker cabinets of varying load (impedance).

The most popular head/cabinet arrangement is the half-stack. The half stack is a head sitting on top of a large speaker cabinet with typically four speakers, usually 12 inch diameter speakers. The name half stack is a derivative of the stack, an amp with one head sitting atop two speaker cabinets with four speakers each. Hence the name stack – it is literally a stack of big boxes. A stack is a big, heavy, and loud amplifier arrangement that is only needed for the largest of venues, either a large arena or outdoors. A half stack, while still bulky and loud, is more manageable and thus is suitable for a wider variety of venues.

The combo amp may contain one speaker of sizes from 4 inch up to 12 inch. Some combos contain two twelve inch speakers, and some contain four ten inch speakers. More speakers means more power, and also more bass response. My rule of thumb … for good tone I recommend that if the combo amp has only one speaker, then stick with amps that have a 12 inch speaker.

Take note of this: you do not need a half stack to achieve high volume levels. A good quality combo with two 12 inch speakers will produce volumes comparable to a half stack of similar power. For large live venues the sound that the audience hears is coming through the much louder P.A. system anyway, via a microphone on the guitar amp speaker.

Fender vs. Marshall Tone

There are two basic guitar amplifier architectures on the market, both based on amps designed around specific power stage tubes. One is the Fender sound which is a clean tone based on the 6L6 tube. The Fender amps are coveted for pristine clean tones at higher volumes (a.k.a headroom – the amount of volume an amp can produce before distorting). The Fender sound is great for Blues, Jazz, and Country styles. The Marshall amps are based on the EL34 tube which produces a desirable distortion or break-up at moderate volume levels. This makes them desirable for any kind of guitar music that features distortion, such as rock or metal.

Since most guitarists use additional effects pedals to add various effects, there is some overlap between these tones. Most tube amps on the market today are some kind of imitation or derivative of the Fender or Marshall amps. Another popular tone is the EL84 tube tone associated with the classic VOX amps and often used on lower power tube amps. The EL84 tone has a sharp bright treble response and less bass response than the physically larger 6L6 and EL34 tubes.

If you want to know whether your amp is a Fender or Marshall type of amp, just check the power tubes. However, every amp consists of many components and built-in tone coloring characteristics, so you will not be able to know for sure what an amp sounds like without actually playing through it. There are many good quality amps on the market today besides Fender and Marshall. Let your ears be the judge. I prefer the tone of a Marshall, although I have heard great sounding tones coming from many other amps.

Amp Simulators

Modern computer technology has brought us guitarists the ability to include computers in our arsenal of music making tools. Popular simulators such as Pod Farm, Amplitube, and Guitar Rig allow us to plug our guitar into our computers via an interface box and then play through the computer. This is a great tool for practicing, as the simulation software will allow us to mimic a wide variety of tones from different iconic amplifiers and effects, all with just a few clicks of a mouse. For practicing guitar and learning about various amps and effects, this is the best thing that has happened to guitarist in decades. These simulators, in conjunction with other computer programs, also allow for pro-quality recording of your playing right in your bedroom, at volumes that will not disturb your neighbors or even the people in the next room.  Assuming you already have a computer, these simulators are not nearly as expensive as a real guitar amp of good quality, so I highly recommend a simulator program for those new to electric guitar. After spending some time with a simulator you will have a better idea of the tone variation among the popular amps, so you will have a better sense of what you are looking for when you go to invest in a real amp.

Miscellaneous Considerations …

Guitar amps often have multiple channels to allow you varying tonal options from the same amp, from pristine clean to raucous distortion. In addition, each of these channels will usually have separate volume controls and maybe even separate input (gain) and output volume controls. Finally there will be one master volume control that controls the final output volume of the amp regardless of which channel you select. It is important to understand that there is a significant difference in volume from your guitar when you are playing rhythm versus solo. The multiple amp channels allow you to change for instance from a clean or slightly distorted tone for chords, to the richer harmonic content and increased sustain of distortion for playing individual notes of a solo. You will lose a significant amount of volume from the guitar when you change from playing chords to playing individual notes, such that if you set your amp up during sound check to match the band volume when you are playing chords, when you go to play solo at the same volume you will be drowned by the band. So you must set the volume on your solo channel significantly higher than that of your rhythm channel.

It is important to note that the amp tone will change drastically as you increase the volume. For instance, at low volumes the bass response will be weak so that you have to turn the amp up to get a balanced sound across the frequency spectrum. The electronic components will affect the tone to different degrees at different power levels. Power tubes deliver a certain coveted distortion that only appears when the tube is pushed to higher power levels. Speakers have a certain inherent stiffness so that they will only yield their best tones when pushed into lively motion to a certain degree (speaker excursion). Altogether, what this means is that the best electric guitar tones often come at the price of higher volumes. It is a never ending quest for guitarists to coax a good tone from our electric guitar amps at lower volumes, especially with distorted tones. It can be done, but it will take some time and effort learning how to tweak your amp.

Any given guitar amp is going to produce a wide variety of tonal qualities based on the options available on the amp, the guitar and effects plugged into the amp, and importantly the playing characteristics of the player playing through the amp. Pros often have their amps modified away from the manufacturer designs. So just because a certain guitarist you enjoy uses a certain kind of amp, that does not necessarily mean you will be able to reproduce their tone easily by purchasing the same amp. Before you rush out and buy the same amp as your guitar hero, be sure you play through a number of amps first. It may be that you will find your preferred tone coming from a box that you wouldn’t have expected.

Copyright © 2024 Palmetto Music Institute. All Rights Reserved.

Guitar Lessons Greenville SC

Must Know – Guitars, Strings, Picks

By Chad Crawford, PMI Guitar Instructor

 If you are new to guitar or even somewhat experienced, you may be overwhelmed by all the options regarding types of guitars, strings, and picks. After you read this brief article, you will be an expert on guitar hardware!

There are two basic categories of guitar: acoustic and electric. We will discuss the nature and purposes of each below.

Acoustic Guitars

Acoustic guitars have a large hollow wooden box for a body, with a round hole or some other kind of opening to naturally amplify the sound of the strings. There are two main types of acoustic guitars: classical and folk. The classical guitar, as the name implies, is meant for playing classical style music. You can identify these guitars easily by the presence of three nylon strings which look like clear plastic. The folk guitar uses steel strings, with the larger strings also having a bronze wrap. Folk guitars are typically larger than classical guitars and have a narrower neck to facilitate chords. Folk guitars are louder and have brighter tone than classical guitars. While either of these types of guitars may come equipped with an option for electronic amplification, we still consider them acoustic guitars.

The dobro or resonator is a specialty acoustic guitar which uses internal metallic plates to amplify the sound of the strings. While it looks much like a standard acoustic guitar, the playing techniques and sound are different enough that many consider the dobro a different instrument from a traditional guitar.

Electric Guitars

Electric guitars come in two main varieties: solid body and hollow body. The hollow body has open chambers in the body with holes, similar to an acoustic guitar, for naturally amplifying the sound of the strings. Despite the opened chambers, they are not nearly as loud as a true acoustic guitar and thus require amplification to be of any practical use. They have a warm (less treble) sound quality which is great for blues, jazz, and other clean (non-distorted) tones. Due to the resonant chambers they tend to present feedback (prominent squealing sound) at moderate amplifier volumes.

The solid body guitars have, as the name implies, a completely solid body section with no open resonant chambers. Some solid bodies have internal resonant chambers with a view toward enhancing sound quality, but these chambers will not be opened to the air so they provide no sound amplification and no feedback problems.

Before we go farther with discussing solid body guitar types, let’s take a moment to consider several very important factors in guitar construction: pickups, neck profile, and frets.

Pickups are coils of wire wrapped around magnets. The magnets generate a magnetic field and the coils pick up variations in the strength of the field through electro-magnetic induction. When we strike a metal guitar string placed within the field of pick up, the string vibration disturbs the field. The coils pick up on the changes in the magnetic field and generate a tiny electronic signal, which we send out to an amplifier through a cable.

There are two main types of guitar pick ups: single coil and humbucker. Single coils have one coil of very thin wire wrapped around a series of magnets, usually one magnet per guitar string, arranged so that each magnet is directly under a string. Single coils produce a sound that emphasizes treble and bass frequencies. They tend to pick up electronic noise such as radio frequency signals generated by appliances and lights.

Humbuckers are made of two magnet/coil sets merged into one big coil. They tend to produce a stronger signal which is helpful with distorted guitar tones. They also have a built-in tendency to reject extraneous electronic signals so they do not make as much noise as single coils. They generally have a more balanced frequency response than single coils so that they do not emphasize treble and bass frequencies like single coils.

Neck Profile refers to the depth of the neck and the radius (curvature) of the fretboard. A low number radius like 9 means the neck is relatively curved which is helpful for making bar chords since it fits the shape of the hand well. Necks with a flatter fretboard will have a higher radius number such as 14. These necks will also tend to have less depth from the fretboard face to the back of the neck. These flatter necks are more helpful for playing scales and arpeggios. A Compound Radius neck will have a radius that changes from curved near the nut to flat near the body, so that you can make chords easily near the nut while also having the advantage of flatter neck above the 12th fret for facilitating fast scale runs and extreme bends.

Frets come in different sizes and materials. The standard fret wire alloy supplied with most guitars is reasonably durable and provides a well-balanced tonal quality. Stainless steel frets last longer than typical frets but cost more and tend to emphasize treble frequencies. Medium frets are suitable for most hobbyists. For progressive rock, metal, or other high-speed styles, the larger jumbo frets will serve better for high-speed scales, sweep arpeggios, and extreme bending.

Most solid body electric guitars bear a similarity to one of two iconic electric guitars: The Fender Stratocaster and the Gibson Les Paul. The standard Stratocaster features three single coil pickups, a 25.5-inch scale length (measurement from nut to bridge), and a spring-action floating bridge with a bar for activating the spring action. The floating bridge allows you to apply a pitch variation to the strings through pushing and pulling the bar. The longer scale length means the strings are tighter and the frets are a bit farther apart, so Stratocasters are a little more challenging to play. The body wood is typically alder which enhances the single coil tendency toward emphasizing treble and bass, giving the Stratocaster a bright, glassy chime in the treble range combined with rich, deep bass response. The neck pickup provides a more balanced overall tone which is good for playing cleaner tones, while the bridge pickup provides a more treble enhanced tone which is useful for distortion sounds. The middle pick is reverse wound from the neck and bridge, providing a tone that is in between the neck and bridge in terms of treble enhancement. The middle coil provides noise cancellation similar to a humbucker whenever the middle coil is activated at the same time as one of the other coils.

Many modern rock guitars are spin-offs of the Stratocaster, often called “super-strats”. The super strats will have more pointy bodies and head stocks, with flatter neck profiles and humbucker pick ups to facilitate high distortion, high speed solos.

Gibson Guitars designed the Les Paul around a dual humbucker pick up configuration, with a shorter 24.75-inch scale length. The humbuckers deliver a strong signal for maximum distortion, while still yielding a great balanced tone for cleaner sounds. The mahogany body tends to de-emphasize treble, leading to a tone that many guitarists describe as “darker”. The shorter scale length means the frets are closer together and the strings are not drawn as tight, so these guitars can be a bit easier to play than the Stratocasters, especially for smaller hands. Like the Stratocaster, the pickup closer to the neck will provide a balanced tone which is great for clean sounds, and the neck pick up will provide more treble clarity which is helpful with distortion tones. The Les Paul also features a fixed bridge for more stable tuning and better sustain than Stratocaster type guitars.

If you are new to guitar and not sure what kind of guitar to start with, I recommend solid body electric guitars for all students of guitar primarily interested in styles other than classical. Solid body electric guitars have small, flat bodies, thin necks, and pliable strings, which altogether makes them easier to play than other types of guitars. After developing a certain level of technique proficiency, you will then have a better experience of playing other types of guitars. Both Fender and Gibson offer entry level, low cost Squier and Epiphone versions of their higher end guitars, for very reasonable prices in the range of $200.

Strings

Strings come in different sizes and materials. Bronze strings are for acoustic folk type guitars, and nickel-plated steel is for electric guitars. Thin strings are more pliable and easier to bend, so they are helpful for beginners and those who wish to play at very high speeds. Thicker strings provide a more balanced overall tone with better sustain. String sets with a .010-gauge high E string are a good balance between tone and playability. I use Martin .011 Gauge strings for my acoustic guitars, and D’Addario XL .010-gauge strings for my general-purpose electric guitars.

The term “action” refers to the height of the strings above the frets. Lower action means less pressure and less time to fret a note, so it may seem to make the guitar easier to play.  The tradeoff is more fret buzz, more difficulty with bending, and more difficulty with sweep picking techniques. The manufacturer specified string height is typically a good balance.

Picks

Picks also come in many materials, shapes, and thickness. A floppy pick leads to weak pick attack and reduced speed and control. For bronze string acoustic guitars, I use a medium gauge pick of .8 mm for a good balance of control and playability. For electric guitar I use thicker and more stable heavy gauge 1.5 mm large triangular picks by Clayton. A larger pick will provide more surface area and thus better grip and less unwanted shifting. Different materials provide varying grip, tone, and response. I prefer large, thick acetyl picks for a good balance between durability, grip, and tone. Picks are cheap, so you can afford to experiment to find the one that suits you best.

Copyright © 2005 Palmetto Music Institute. All Rights Reserved.

Tuner Pedal

Effective Effects

Primer on Guitar Effects

by Chad Crawford, PMI Blues Guitar Instructor

So you have an electric guitar now and maybe a small starter amp and you are starting to become aware of all these little extra boxes that some guitar players use. What is all this stuff? What does it do, and do you need it? Well, this could be a huge subject but I am going to cover only the basics. Once you understand the basics you can do a little more research on your own to decide what, if any, effects that you may wish to incorporate in your preferred tone. First, a little background information …

Definitions

Tone – At the root of all discussion of guitars, amp, and effects, is one core concept: Tone. You will see this term in all manner of advertisements for guitars, amps, and equipment, and you will hear it discussed and even argued among musicians. What does it mean? It has somewhat of a subtle meaning that will be hard to understand well until you develop a little skill on the guitar and begin to develop your discernment for sound quality. For the moment let’s try to understand it this way. Tone refers to the overall sound quality of your instrument. I do not mean quality in the sense of good or not so good, but rather quality in the sense of characteristics. For example you might say that wood has certain qualities and metal has certain qualities. Likewise, sound has different qualities and these qualities vary among different guitars, amps, and effects, and various combinations of the above. As you develop as a musician you will naturally gravitate toward a certain preferred quality of sound from your instrument. Musicians refer to this quality of sound as tone.

Pedal – a floor standing effect device usually actuated by a foot switch, leaving the rest of you free to work your guitar magic. Guitarists often install pedals in a Pedal Board, which is simply a suitcase specifically designed for mounting guitar pedals and associated wiring.

Rack Mount – the effect circuitry does not care if it is mounted in the floor, wall, ceiling, amp, or wherever you want. So some effects come in a convenient box that is designed to mount into a specific type of instrument electronics travel cabinet (rack). This allows for manipulation of the parameters of the effect without having to kneel to the floor. Rack effects are also more typically able to be controlled via “midi”, which allows for advance programming of various combinations of effects such that one can have preset effects combinations for each song, readily accessible either by foot control or else remotely by the sound engineer at the control board. Rack effects tend to be more sophisticated than their floor pedal counterparts.

Sensitivity – the ability of the guitar to sound out clear notes with minimal finger pressure and string striking power. This will depend largely on the guitar and amp, but some effects also affect sensitivity. Generally, more is better.

Sustain – the ability of the guitar to continue sounding out a note after it has been plucked. As with sensitivity, this will also depend largely on the guitar and amp. Some effects will affect sustain and in fact some effects are specifically to enhance sustain. As with sensitivity, more is generally better.

Utilities:

Some devices referred to as “effects” are not really so much effects but rather are more like utilities. This will make more sense as we discuss specific devices. So let’s dive into specific effects now. Keep in mind we are speaking in general terms. There are literally thousands of effect devices on the market with various combinations and qualities of various kinds of utilities and tone alterations. We will highlight the basic concepts here.

Noise Suppressor or Noise Gate – the purpose of a Noise Gate is not to alter tone but rather to remove noise, as the name implies. If you have had some opportunity to play around with your guitar and amp you may have noticed a hum from your amp when you are not playing the guitar. The purpose of the Noise Gate is to remove that hum or at least reduce it to a very low level. If you are new to guitar and mostly playing at bedroom volumes then the hum may not bother you so much.  As your ear for music develops and you begin to gravitate toward higher volumes for live group performance, the hum will grow louder and more annoying! Then you will want a Noise Gate.

Volume – more of a utility than an effect, although you can use a volume pedal prior to the pre-amp to create a keyboard-like tone from your guitar (a.k.a swell). The main purpose, however, is to control the guitar volume without having to use your hands to manipulate knobs.

Tuner – an electronic device that provides a tuning reference for you to measure your guitar’s tuning against. It allows for very rapid and accurate tuning.

General Purpose Effects:

Echo – May also be called Reverb. This is a very common effect and many modern amps will have this effect built in. The echo or reverb effect is similar to the natural phenomenon of echo. It works like this: you play a note on your guitar. The echo processor will expand that as if you played it in a large room or cavern. This effect adds fullness to your tone, making it sound more natural and thick. Of course you can dial it in to an extreme that does not sound natural at all.

Delay – similar to echo, but delay is a more specific, narrow reproduction of the note you just plucked. Unlike natural echo, you control the volume level and timing of repeats, as well as the decay (attenuation level or loss of volume level) of the repeat notes. As with echo, this effect adds fullness to your tone, making it sound more natural and thick. And again you can dial it in to an extreme that does not sound natural at all.

Expression – this effect is often referred to as Wah, Wah Wah, or Crybaby. It is typically a pedal that you oscillate with your foot to move an internal tone control through a range from very pronounced high/mids to very diminished high/mids. It will also alter your overall tone. You may also see it in the form of a device that automatically cycles throughout a preset tone range without oscillating foot pedal input.

Distortion – Distortion is the characteristic electronic fuzz sound associated with electric guitars. There are different levels of distortion and different types of distortion that yield different overall guitar tones. Most modern amps will include a distortion effect by design, often referred to as Drive, Overdrive, or Gain. Additionally, you can usually achieve a certain natural distortion by over powering your amp speaker(s) at high volume levels. A distortion pedal can enhance tone, sensitivity, and sustain at lower volume levels. Choosing a distortion pedal can get complicated because this is very much a matter of personal preference. Also, the different types and degrees of distortion have trade names, such as crunch (mild distortion), overdrive (substantial distortion), and fuzz (extreme distortion). Beyond this, the brand names of distortion pedals, like the popular Tube Screamer, may not indicate distortion at all. You will often see distortion pedals referred to as a Stomp Box.

Compressor – the purpose of a compressor is to raise low volume signals and suppress high volume signals. The intent is to level out the harshness of extreme variation in volume levels. Because it raises the power level of lower volume or weaker signals, it will also enhance sustain.

Modulation – this effect comes in a variety of forms and goes by different trade names even though it is all the same underlying effect. You may see it identified as Flange, Chorus, Phaser, Rotary Horn, Tremolo, or Uni-Vibe. The basic idea is to impose a varying frequency signal over your guitar signal, creating a wobbling sound. As with other effects, you control the rate and degree of the wobbling. The various names indicate different types or tonal qualities of the effect.

Many vendors have floor controllers or rack-mount controllers that incorporate some or all of these effects and more all in one box, such as the POD products by Line6.

Now that you know the terminology, you may be wishing you had some sounds to associate with these names. You can easily find demonstrations on various vendor sites such as MusiciansFriend or Sweetwater, or video hosting sites such as YouTube. Alternatively, if you’re willing to invest around a hundred twenty dollars for an entry level converter box (interface) such as the Focusrite Scarlett solo, along with another hundred for an entry level guitar simulator program such as Amplitube or Bias FX, then you can experiment with a variety of guitar effects with a simple click of the mouse.

Hardware or software, experiment and enjoy!

Copyright © 2024 Palmetto Music Institute. All Rights Reserved.